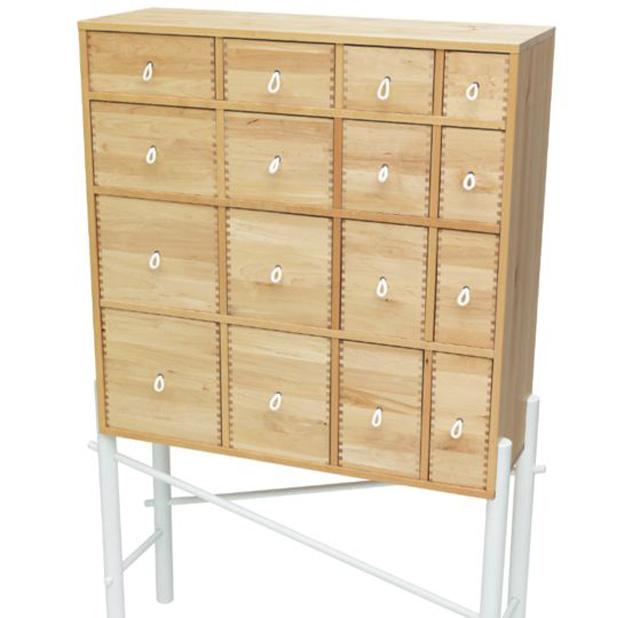
Good morning everyone! Sorry for yesterday but I was very busy and I couldn?t write a post? As today is Wednesday, it’s time for another post of *My new home*. I want to show you a very creative and original DIY to personalize wooden furniture.
El ejemplo que os quiero mostrar es utilizando la cajonera modelo Sinka de IKEA junto con los siguientes materiales:
Imprimación selladora
Pintura blanca
Recortes de diferentes papeles pintados o telas
Pegamento en aerosol
Brocha
Lija
Lápiz, regla y tijeras
The example I want to show you is using the IKEA Sinka chest of drawers and the following materials:
Primer sealer
White paint
Scraps of different colorful papers or fabrics
Aerosol glue
Brush
Sandpaper
Pencil, ruler and scissors
Una vez tengáis todas estas cosas preparadas, ya estáis listos para empezar este sencillo y low cost DIY siguiendo estos sencillos pasos:
Quitar los tiradores y lijar toda la estructura de la cajonera y los cajones.
Aplicar una capa de imprimación selladora y dejar secar.
Dar a todas las superficies dos capas de pintura blanca dejando tiempo de secado entre ellas.
Medir cada frente de los diferentes cajones y luego cortar el papel siguiendo estas mismas medidas.
Rociar el pegamento en aerosol sobre la parte frontal de cada cajón. También se puede utilizar cola para papel, que se puede aplicar con un pincel. En cualquier caso, una capa será suficiente.
Pegar el papel a la madera colocando cuidadosamente el trozo de papel y presionándolo con los dedos para evitar que queden burbujas o pliegues, y después retirar los restos de pegamento.
Por último, perforar el papel a la altura del agujero central con el fin de poder poner los nuevos tiradores o los originales.
¡Y vuestra nueva cómoda está lista para usar!
Once you have all these thigs prepared, you’re ready to start this easy and low cost DIY following these easy steps:
Remove the handles and then sand the whole structure of the cabinet and drawers.
Apply a layer of sealant and let it dry.
Give all the surfaces two coats of white paint leaving time between them.
Measure each drawer fronts and then cut the paper after these measures.
Spray the front of every drawer with the aerosol glue. You can also choose glue for paper, which can be applied with a brush. In any case, one layer will be enough.
Paste the paper to the wood; carefully place the piece of paper and press it with your fingers to avoid leaving bubbles or folds, and then remove glue residue.
Finally, perforate the paper where the central hole is, in order to place the new handles or the original ones.
And your new chest of drawers is ready to use!!
Images via: mi tablero de Pinterest // my Pinterest board “DIY – Hazlo tu mismo”
Tutorial via: Mi casa
¿Os ha gustado esta idea? ¿Habéis transformado alguna pieza de mobiliario alguna vez? Creo que es una excelente idea para personalizar y dar un toque único a un objeto común, ¿no os parece? Que tengáis un estupendo día y ¡¡hasta el próximo post!!
Did you like the idea? Have you ever transform any piece of furniture? I think it’s a great way to personalize and give an unique touch to a common object, don’t you? Have a great day and see you on the next post!!
*Ana*
La entrada *My new home* Personalizar muebles de madera // Personalize wooden furniture aparece primero en Decoraddiction.


